Adobe Audition is one of the most popular audio editing software packages available today, commonly referred to as a digital audio workstation (DAW). Other common audio editing tools include Audacity, Twisted Wave, Pro Tools, and GarageBand. Each is a very powerful kit of software with loads of capability–most of which you will never, or rarely, use as a voice over talent. Here are the basic settings and preferences I use to run Adobe Audition optimally for voice over recording, editing, and production.
Purchase and Installation
Open a web browser, navigate to the Audition product page on the Adobe website, click on the Buy Now button, and view the plan options. At the time of this writing, you can either buy the stand only version for $21.00 per month (or $252 per year) or as part of the Adobe Creative Cloud bundle at $55.00 per month (or $660 per year). Download the file and run the installation program following the prompted instructions. Open and run Audition for the first time and ensure you have the latest version by navigating to Help and then clicking on Updates. Finally, restart your computer.
Edit Preferences
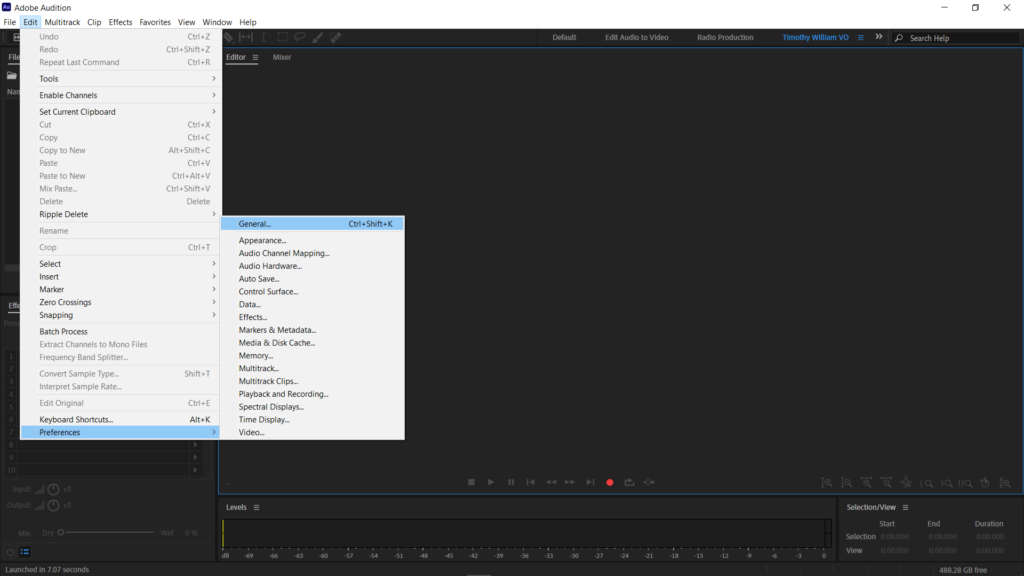
Once you have the software installed and running, the next step is to make adjustments to several preferences by navigating to the Edit menu and selecting Preferences and then General:
Audio Hardware
Depending on the audio interface you own, you will want to download the associated software and drivers for that particular device. It is also important to be sure the sound settings on your computer match those of you interface and DAW. Check out this blog post on how to complete these steps.
Playback and Recording
Change the Pre-roll Duration to 7 seconds for punch and roll editing. You can always change this later, after you become more experienced with this technique. When creating a new file to record voice over, unless the client requests otherwise, be sure to use the following settings:
- Sample rate: 44,100 (44.1kHz) or 48,000 (48.0kHz)
- Channels: Mono
- Bit depth: 16 bits or 24 bits
Adjust Levels
Before adjusting levels within Adobe Audition, be sure to disable (uncheck) automatically adjust volume in any video conferencing software you have installed on your computer, such as Zoom, Skype, or Teams. The noise floor, or room tone, of your recording space needs to be at, or below, an acceptable level of -60 dB. Start off by setting the gain on your interface to three o-clock and make adjustments until your voice recording volume levels are between -12dB to – 6dB.
Simplify the Workspace
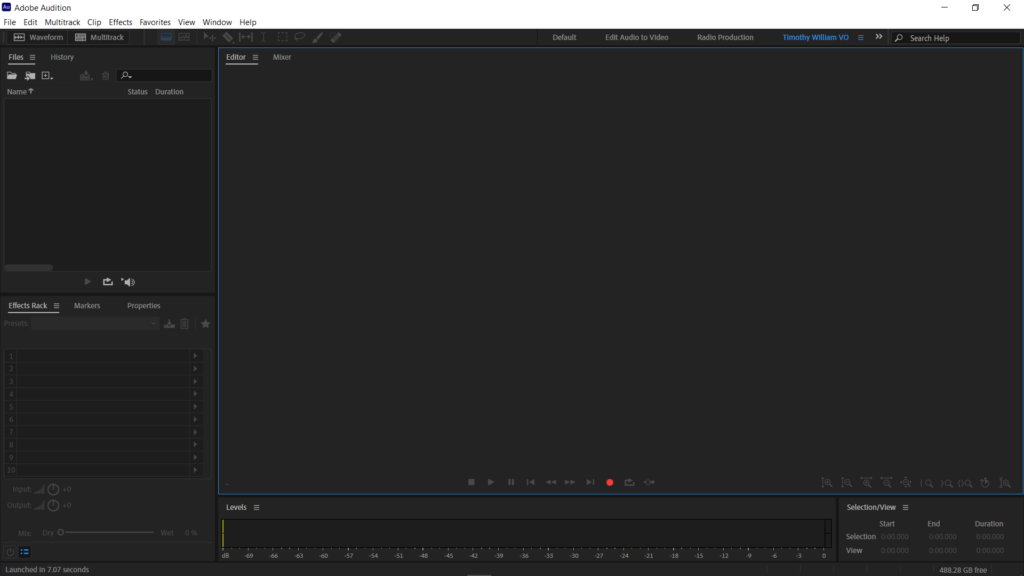
Next, simplify the workspace by selecting only the features and functionality you use most for voice over work, including the following seven windows by navigating to Menu and then Window and enabling (check) each one:
- Tools along the very top of the workspace
- Files and History to the upper left
- Effects Rack to the left and below Files and History
- Editor to the right and the largest portion of screen space
- Enable View Waveform Editor and Show Spectral Frequency Display
- Levels and Selection/View below the Editor window and at the bottom of the workspace
- Right-click on Levels and use the context menu to adjust the Range to 72dB or 96dB
Save your Workspace
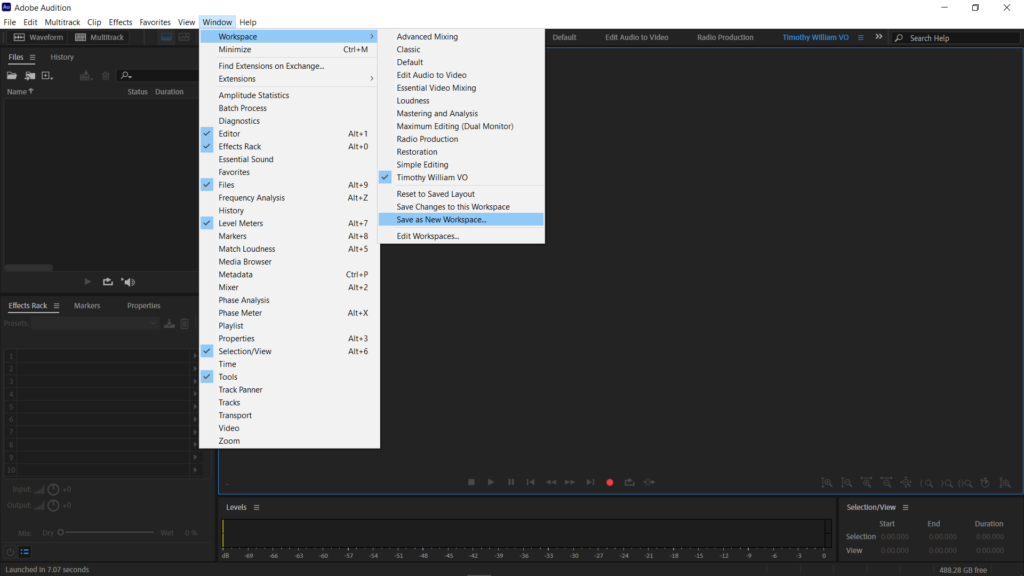
Finally, once you have made all of the changes outlined above, you will want to save your workspace for the next time you open Adobe Audition, after a software update, or if installing on a new computer. All you need to do is click on Window > Workspace > Save as New Workspace > type in a custom name for your workspace and click on the Ok button.
You now have Adobe Audition setup and running effectively and efficiently for voice over. Be sure to read my related blog posts, including a detailed explanation of audio hardware settings as well as editing and processing audio for high-quality voice over.